

|
StableBit Scanner 1.X
An innovative disk surface scanner, disk health monitor and file recovery system.
|
Toolbar
(Build 2635)

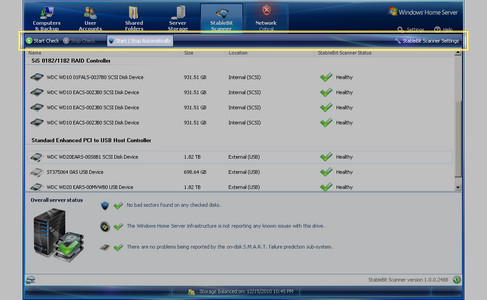
The toolbar lets the scanner operate in automatic or manual mode. It starts or stops the checking of all the disks manually and lets you enter the settings window.

When Start / Stop Automatically is enabled, the StableBit Scanner will automatically scan the surface of all the disks part of the storage pool as necessary. If it's disabled, then the StableBit Scanner will never start scanning any of your disks automatically, regardless what is set up in settings.
StableBit Scanner maintains a record of the last check time of each and every sector, for every disk that it has ever seen in the past year. When the StableBit Scanner is in automatic mode, and the last check time for any sectors becomes older than the number of days set in settings, then those sectors become candidates for re-scanning.
Re-scanning can happen at any time, or between certain hours of the day, depending on what is set up in settings.
If the scanner is in manual mode, then re-scanning is never started automatically. You can either start scanning individual disks, or click the Start Check button on the toolbar to check the sectors that need re-checking on all of your disks.
The Stop Check button stops all disk checks and sets the scanner to manual scan mode only. You can re-enable automatic scan mode by clicking Start / Stop Automatically.
 |
Multiple disks will be scanned at the same time as long as they're on different controllers. |
 |
When in manual mode, the scanner will only re-check the sectors on the disk that haven't been checked recently. If you want to force a re-check of a given disk immediately, you can right click on it and select Force Re-check. |
 |
Formatting the disk or adding it to the storage pool may reset it's check history. This is because the unique disk signature may be changes and StableBit Scanner will not recognize the disk as the same one. |
 |
After adding a new disk that has never been scanned to the storage pool, it will be marked for scanning at the next available time window. However, you can set the scanner to scan any new disks as soon as they're detected, regardless of whether they are part of the storage pool or not. This can be set up in Settings by un-checking the Only automatically scan drives in the storage pool check box. If you do this, you may also want to select the Perform work at any time of the day option in order for the scans to start immediately. |


