


|
StableBit Scanner 1.X
An innovative disk surface scanner, disk health monitor and file recovery system.
|
Quick Start
(Build 2635)

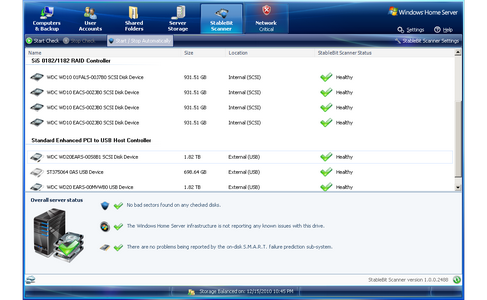
The StableBit Scanner is fully automatic and will post events using Windows Home Server's network health notifications if it finds anything wrong with any of your disks.
It's set up with reasonable defaults and will run automatically without requiring any maintenance.
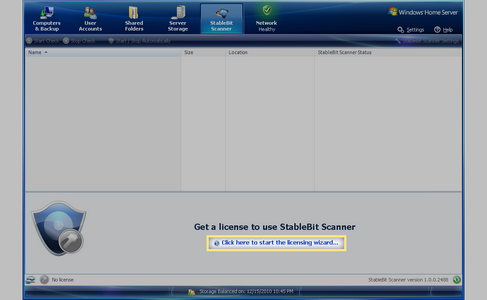
If this is the first time that you're starting the StableBit Scanner, you will need to get a license to use it.
Getting a license is quick and easy. Just complete the simple licensing wizard and you're good to go.
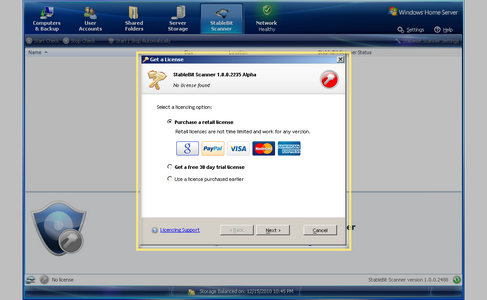
Follow the steps in the wizard to either get a Trial license or a Retail license.
 |
If your server is not connected to the Internet, the wizard has an offline mode where you can activate the software with a web browser on a different computer with Internet access. |

Choose whether you want cloud integration mode enabled. If enabled, the StableBit Scanner will communicate with a web service on the Internet in order to enable some advanced features such as better USB enclosure support, S.M.A.R.T. interpretation and error reporting.
We recommend that you enable it to get the most out of the StableBit Scanner.
Well, there is no step 3 actually. You're done. The StableBit Scanner will monitor your disks and report any problems found. But here's some more useful information to get you started.
The StableBit Scanner uses colored icons throughout the software to represent the state of things.
Status Icons:
-
 Generally speaking, a green icon means "Yes", or that everything is fine.
-
 A red icon means "No", or that something is wrong.
-
 A gray icon means that the information is not available.
The Main Switch:
One more thing, the StableBit Scanner has a main off switch on the toolbar of the main window. It's called Start / Stop Automatically.

If this is turned off, then no automatic surface scans will take place and you will need to start them manually. We recommend that you leave this button enabled.